Tuesday, May 31, 2011

Calibrating the map

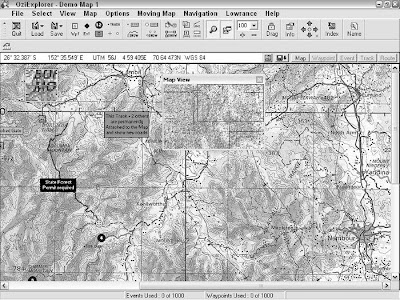
After you scan, edit, and save your map, one more step is left before you can start using the map with OziExplorer. At this point, your map is simply a graphics file. You can use Microsoft Paint or any another graphics program to view, edit, and print the map, but you want to turn the image into a smart map to take advantage of OziExplorer’s features.
This involves calibrating the map, which involves linking georeferenced data with the map image so that each pixel in the map has a geographic coordinate associated with it. When a map has georeferenced data, you can
  • Move the cursor on the map, and OziExplorer will accurately report the coordinates of the cursor in latitude and longitude or UTM (Universal Transverse Mercator)
  • Draw lines on the map to measure distance.
  • Calculate the size of areas.
  • Track and display your current position on the map when the computer is connected to a GPS receiver.
  • _ Transfer GPS waypoints, routes, and tracks between the map and a GPS receiver.
When you calibrate a map with OziExplorer, the georeferenced data isn’t embedded directly inside the image file. OziExplorer creates a separate MAP file (.map) that contains the following information:
  • The location of the map image file
  • The map datum
  • The map projection
  • Map calibration data
Inside a MAP file, the file is in text format and can be viewed with any word processor.
Calibration requires you to identify a series of points on the map with known coordinates. Depending on the number of points that you select, as well as the map datum and projection, OziExplorer performs different mathematical calculations to link coordinate information with the map image. To demonstrate the process of calibrating a map with OziExplorer, use a scanned copy of a 1:100,000 scale USGS topographic map Some digital maps have georeferenced data embedded directly into the map image as tags or come with associated files that contain the reference data. (A common example is a DRG map.) OziExplorer can use these maps without going through the calibration process that I describe next. Check the OziExplorer Web site or the program’s online help for a full list of these supported map types.

Edit the map

After you successfully scan the map, make any last-minute changes to the image. This could include
  • Adjusting the brightness and contrast to make the map more readable.
  • Adding symbols or text information.
  • Removing the white space (or collar as it’s known in map-speak) that surrounds the map.
Use your favorite graphics program to make any final edits to the map image. After you’re through, save the map as a TIFF, PNG, or JPG file to reduce how much disk and memory space the image takes up. (These compressed file formats are more space-efficient and memory-efficient.) The shareware version of OziExplorer can load only BMP images. Because bitmaps aren’t compressed, the entire file must be loaded into memory, which can slow down the performance of computers that don’t have much RAM.

Thursday, March 31, 2011

OziExplorer and World War I


The 1980s movie Gallipoli recounted the Australian experience of fighting the Turks during World War I. Although long before the time of computers and mapping software, WWI also has a link to OziExplorer.
Howard Anderson wrote a fascinating article on using OziExplorer to locate old World War I trench lines in France and Belgium. The remains of the trenches are long gone, but by using old maps from the period, scanning them, and adding georeferenced data, Anderson was able to clearly determine where the trenches were dug during the early 1900s.
After he had scanned and georeferenced the old military maps, Anderson used OziExplorer to draw GPS tracks on personally created digital maps to trace the outlines of the trenches. He also used waypoints to identify military and land features. Anderson then took the tracks and waypoints and overlaid them on a modern map in OziExplorer. This revealed where the longago war emplacements once stood. Anderson’s last step was to visit France with a GPS receiver and his old and modern maps. He found that, with relative accuracy, he could stand on the site of a trench where his grandfather had fought over 85 years ago.

Scanning a map


The first step when converting a paper map to a digital map is to scan the map and turn it into a graphics file. You don’t need an expensive, high-end scanner to accomplish this task; most any color scanner will work. If you want to scan a large map — say, anything bigger than a legal size piece of paper — consider literally cutting it up into pieces that will fit on your scanner. (8.5 x 11 inches works well.) Instead of using a pair of scissors, use a paper cutter, such as those found at copy centers, to ensure that you end up with straight cuts. The straight cuts are important for accurately aligning the map on your scanner. Although you can scan a large map one portion at a time without cutting it, it’s more of a challenge to get the edges lined up when you stitch them together as I discuss next.
Here are some tips to improve your map scanning:
  • Use medium dpi: Scanning the map between 125–200 dots per inch (dpi) is good enough; you don’t need to scan at higher resolutions typically used for reproducing photos.
  • Use color photo scanning: Most scanning software has different settings for different types of documents you want to scan, such as text, line drawings, and photographs. Select the color photograph option to retain the most detail. However, remember that most maps don’t have millions of colors like photographs, so if your scanning software supports it, use a 256-color setting.
  • Watch edge alignment: Place the to-be-scanned map directly on the scanner, ensuring that the edges are aligned directly against the scanner bed with no gaps. You need to keep the paper map as square as possible to reduce distortion during a scan.
  • Prevent edge distortion: To help keep the map edges pressed flat, leave the scanner cover open and use a book or something heavy to set on top of the map. The edges are typically where the most distortion occurs during scanning because they tend to lift up.
  • Experiment with settings: Try a couple of experimental scans first, changing the brightness and contrast settings. If you’re going to be scanning a number of maps over a period of time, write down the settings that gave you the best output so you can use them next time.
  • Save the final scan as BMP: When you’re ready to produce a final scan of the map, initially save it as bitmap (BMP) format file. This produces an image that’s as close to the original map as possible; bitmap files aren’t compressed like JPG and other graphics file formats.
Bitmap files do take up a lot of memory and disk space, but after you edit a file, you can save it as another graphics format that’s smaller in size. If you have a map that’s made up of multiple image files, such as a large map cut up into a series of smaller maps, you’ll need to stitch them and a single, large image. Commercial graphics program such as Adobe Photoshop and Jasc Paint Shop Pro have commands for combining files. You can also manually stitch together images with Microsoft Paint by using the Paste From command of the Edit menu. Here’s a link to a great tutorial on stitching together scanned images: www.sibleyfineart.com/index.htm?tutorial—join-scans.htm.

Moving from Paper to Digital Maps


OziExplorer supports a number of different digital map types that use georeferenced data (information that allows a program to precisely identify locations and coordinates on a map). But one of the program’s most powerful features is its ability to turn your own graphics files into georeferenced maps. This means if you have a paper map, you can scan it, load it into OziExplorer, and effectively make it an electronic (digital) map. This is a three-step process:
  1. Scan the map. Use a scanner to create a digital image of the paper map. Stitch individual map pieces, if necessary.
  2. Edit the map. Make changes to the scanned map before it’s used.
  3. Calibrate the map. Load the edited map into OziExplorer and associate georeferenced data with the map image.
The following sections explore the above three steps in further detail. Scanning and calibrating your own maps can be fairly time consuming and sometimes frustrating if you can’t seem to get the map coordinates to match up with reality. Some maps are definitely easier to calibrate than others. If you’re not technically inclined or are somewhat impatient, you’ll probably want to stick to importing maps that are already georeferenced, such as freely available United States Geological Survey (USGS) DRG topographic maps.

Monday, February 28, 2011

Discovering OziExplorer Features


OziExplorer is a powerful and versatile mapping program developed by Des Newman. (Newman hails from Australia, and Ozi is slang for Australia — get it?). Newman originally wrote the program for personal use during four-wheeldrive trips in the Australian outback. He released OziExplorer as shareware, which has evolved into a sophisticated mapping tool that’s constantly updated.
Some of the program’s key features are that it
  • Interfaces with GPS receivers: OziExplorer can communicate with just about every GPS receiver on the market, allowing you to upload and download waypoints, routes, and tracks to and from GPS receivers and PCs.
  • Works in many languages: Localized versions of OziExplorer are available in a number of different languages, including English, German, French, Spanish, and Italian.
  • Provides real-time tracking: If you have a laptop connected to a GPS receiver, OziExplorer displays a moving map with your real-time, current position and other travel information.
  • Is easy to use: OziExplorer boasts a large number of features, such as annotating maps and extensive import and export capabilities, all of which are easy to use.
  • Supports an extensive number of map formats: OziExplorer can access many popular digital map data formats (such as DRG, a Digital Raster Graphics map) and can associate georeferenced data with common graphics file types. For example, you can take a file that you created in Paint or some other graphic program and turn it into a smart map (a map where geographic coordinates are associated with individual pixels). The best way to find out about OziExplorer’s features is to download the program and try it. (OziExplorer works with PCs capable of running Windows 95 through XP.).
  • Trial: The trial version is a limited version of OziExplorer that has all the program features enabled, except the program can’t
• Communicate with GPS receivers
• Save or load waypoints, routes, or tracks
• Save maps as image files
• Run for more than an hour at a time
  • Shareware: The shareware version has a number of features disabled and has the following limitations:
• Only bitmap (BMP) images can be imported as maps (as opposed to many graphics file types in the registered version).
• Only two points can be used to calibrate a map, reducing the potential accuracy. (Up to nine points are available in the registered version.)
• Limited support is available for map projections, grid systems, and datums (compared with extensive support in the full version). Between these two programs available in the install package, you’ll be able to get a feel for all OziExplorer’s capabilities. And when you register the shareware version, the full monty of features is enabled. The $85 registration fee is a nominal investment considering the many features that the full version of OziExplorer offers.
If you’re looking for a street and road navigation program, OziExplorer isn’t the best choice. Ozi is more suited for adventures off the beaten path. If you need a program that helps you find the best route between two addresses on streets and highways, you’re much better off using some of the commercial mapping programs .
For more practical information on OziExplorer, including troubleshooting tips, check out the popular Yahoo! Groups e-mail list and forum devoted to the program at groups.yahoo.com/group/OziUsers-L.
In addition to OziExplorer, Des Newman also has two other related mapping programs:
  • OziExplorer3D: This program is used in conjunction with OziExplorer to display maps in three dimensions. OziExplorer writes elevation data to a file, which OziExplorer3D uses to display a 3-D representation of the map. OziExplorer3D is priced at $30.
  • OziExplorerCE: OziExplorerCE is moving-map software for Pocket PC (formerly known as Windows CE) PDAs. You create maps and plan trips with OziExplorer on your PC and then download the map data to your PDA to use with OziExplorerCE. When you connect your PDA to a GPS receiver, the program retrieves GPS data and displays your current location on a map. The PDA version of Ozi costs $30.
To discover more about the features of these two programs and download demonstration versions, go to www.oziexplorer.com.

QuakeMap

QuakeMap is written by Sergei Grichine and was originally designed to download worldwide earthquake data from various Internet sources and display the information on maps. The program has since evolved into a general purpose, mapping utility that uses TerraServer-USA data. You can use GPS data with QuakeMap, and if you’re a geocacher, the program has several specialized features designed for the sport.

ExpertGPS


TopoGrafix is a software company that produces GPS and mapping programs. ExpertGPS is an extensive waypoint, route, and track management system with mapping capabilities grafted on top of it.
ExpertGPS has a large number of features. In fact, at first glance, the extensive features and user interface can be a little intimidating. However, if you’re a GPS power user with a large collection of waypoints and route data, it’s definitely worth spending some time working with the program to see whether it meets your needs.

Monday, January 31, 2011

TopoFusion

Scott and Alan Morris, brothers and computer science graduate students, weren’t satisfied with the various Windows mapping programs on the market, so they wrote their own. Both are avid mountain bikers, GPS users, and outdoor recreationists; the features in their program reflect this. Some of TopoFusion’s features include
  • Optimized graphics routines for fast map display
  • Terrain profiles of GPS tracks
  • Multiple track file support for constructing trail networks
  • Map digital photo support by determining the location where a photo
was taken by correlating the photo time-stamps with those of the track points
  • Trip playback mode that replays your travel route and provides statistics
  • Combining aerial photos with topographic maps for composite images
The Morris brothers are constantly adding new and useful features to the program and have an online support forum. If you’re using a GPS receiver as part of a trail-mapping project or you are a serious outdoor enthusiast, the advanced features of TopoFusion should put it high on your list

TerraClient

Bill Friedrich’s TerraClient is a free, easy-to-use Windows program that displays TerraServer-USA aerial photos and maps. It doesn’t interface with GPS receivers or use GPS data, but it does have two features that make it ideal for beginning map users:
  • Easy location lookup: Instead of knowing the exact coordinates of the area you want to view, enter a place name and watch TerraClient return a list of possible matches. To view the aerial photo, click the one you’re interested in.
  • Superimposed maps: This is a very slick feature that allows you to superimpose a topographic map on top of an aerial photo. You can control the transparency of the overlay so that only a faded, ghostlike image of the map appears on top of the aerial photograph. This is very useful for quickly identifying features on aerial photos.
TerraClient has an extremely user-friendly interface, and you can be up and running the program in a matter of minutes.

Interfacing with a GPS receiver


Downloading and viewing free aerial photos and maps is pretty cool, but if you have a GPS receiver, USAPhotoMaps has even more features that you can put to use, including
  • Downloading waypoints, routes, and tracks from a GPS receiver to overlay on aerial photos and maps.
  • Uploading waypoints and routes that you’ve created with USAPhotoMaps to your GPS receiver.
  • Interfacing USAPhotoMaps to a GPS receiver for real-time updates of your current position shown on an aerial photo or topographic map. USAPhotoMaps has a separate help file that covers only GPS-related topics. You’ll find comprehensive information on interfacing your GPS receiver to the program and descriptions of GPS-related features. To display the help file, choose Help from the GPS menu.
Click the mouse to add a waypoint wherever the cursor is currently positioned. You’ll be prompted to enter a description and a name (to identify the waypoint if you upload it to a GPS receiver). The waypoint will be displayed as a dot on the aerial photo or the map. Right-click the mouse button to display a list of waypoints.

Friday, December 31, 2010

Saving Aerial Photos

After you have an aerial photo or map displayed onscreen, you can save the image to use with other programs:
  • From the File menu: Choose Copy to Screen.jpg. This saves a copy of the aerial photo or map currently displayed onscreen to a file named Screen.jpg in the same folder that USAPhotoMaps is installed in.
  • Print Screen: Press the Print Screen key to save the current image to the Clipboard. If you want to save only a portion of the map or aerial photo that appears onscreen.
  • BigJpeg: Use the BigJpeg utility. Doug Cox has a free utility that creates a single, 1-meter resolution, JPG format graphics file from a photo or map. You define the boundaries of an area you want to save in USAPhotoMaps and then run BigJpeg to create the graphics file. You can download BigJpeg, with complete instructions, at http://jdmcox.com.

Creating and Using Multiple Map Files

USAPhotoMaps uses a map file to name areas that have downloaded aerial photo or map data. A map file is a bookmark for a general vicinity or location. For example, you might have downloaded aerial photos for the entire Grand Canyon. Instead of scrolling to view photos at each end, you could create two map files, one called North Grand Canyon and the other South Grand Canyon.
To create a map file bookmark
  1. From the File menu, choose New Map File.
  2. In the New Map dialog box that appears, enter the name of the map file and the coordinates that you’d like to bookmark.
  3. Click OK.
After you create a map file, select it, and USAPhotoMaps displays the aerial photo or map associated with that area.
To select and display a new map file
  1. From the File menu, choose Open Map File.
  2. Select the name of the map file to load.
  3. Click OK.
The area that you bookmarked is now displayed onscreen. Map file bookmarks are used to identify a general location. They shouldn’t be used for marking a very specific set of coordinates, such as a GPS waypoint.

Tuesday, November 30, 2010

Entering text in USAPhotoMaps

After you have an aerial photo displayed, you can add text labels to different
features when the image is displayed at the 1- or 2-meter zoom levels. To enter
a text label
1. Move the mouse cursor to the location where you want the text to start.
2. Hold down the Shift key.
3. Move the cursor in the direction you want the text to be aligned. A line is temporarily drawn as you move the cursor. For example, if you draw a line at a 45-degree angle, the text will flow at a 45-degree angle.
4. Release the Shift key.
5. In the dialog box that appears, type in the text label and click OK.
A list of all the text labels is displayed.
Text in a label is limited to 60 characters and can be edited or deleted by choosing Text➪List.
You can set the text color by choosing File➪Preferences➪Colors. The Color Preference dialog box, which isn’t all that intuitive, uses a series of radio buttons that correspond to red, green, and blue values. Your best bet for choosing a color you’d like is to enter some text and then display the Color Preference dialog box. When you select different combinations of color radio buttons, the text you entered changes color.

Enhancing contrast in USAPhotoMaps


One of the things you’ll notice as you start to view aerial photos is that the contrast might be lighter or darker with certain images. This has to do with the amount of sunlight when the photo was taken and the background color of the terrain.
To enhance less-than-optimal contrast, USAPhotoMaps has a nifty feature that lets you adjust the contrast of the photos displayed onscreen by either lightening or darkening them. This can really enhance detail in a photo.
You can control the contrast of a photo by using these keys:
_ Lighten: Press the B key.
_ Darken: Press the D key.
You can also set contrast by selecting Brightness from the View menu, including restoring the contrast back to its default setting.

Sunday, October 31, 2010

Zooming in and out


You can zoom in and out on an aerial photo or map to see more detail or get a larger, big picture view. For zooming, use these keys:
  • Zoom in: Press Page Down or the plus (+) key.
  • Zoom out: Press Page Up or the minus/dash (–) key. The current zoom level appears in the window title bar, so you always know how far you’ve zoomed in or out.
The zoom level on the window title bar displays the resolution of the image. If the resolution is 4 meters-per-pixel, each pixel (picture element) onscreen represents an object 4 meters in size. (Remember that a meter is roughly a yard.) Smaller numbers mean higher resolution and greater detail. For example, 1 meter-per-pixel resolution means that you can distinguish objects on the ground that are one meter in size. How far you can zoom in and out on an image depends on what type of map you’re viewing.
  • Topographic maps: 4, 8, 16, or 32 meters-per-pixel
  • Aerial photos: 1, 2, 4, 8, 16, 32, or 64 meters-per-pixel If you’re switching back and forth between aerial photos and topographic maps, use either a 4 or an 8 meters-per-pixel zoom level. This will give you close to a one-to-one size representation of features on the aerial photo and the topographic map.

Moving around the USAPhotoMaps


You’ve probably noticed that USAPhotoMaps doesn’t use scroll bars like other Windows programs. Not to worry; you can still move around in a photo or map by using the keyboard navigational arrow keys:
If you see gray squares while you’re scrolling, map data has yet to be downloaded for that particular area. Figure above shows gray squares with aerial photo data that hasn’t been downloaded. Here are two ways to fill the squares with map or photo data:
  • From the File menu, choose Download Map Data➪Fill Screen.
  • Press the F key.
USAPhotoMaps connects to TerraServer-USA and downloads the map data for that area.
Instead of scrolling, you can also go directly to a location that you know the coordinates of. Just choose the Go To Lat/Lon item in the View menu and enter the coordinates.
USAPhotoMaps has two display modes: aerial photo and topographic map.
When you download data to fill in the gray squares, only data for the particular
mode that you’re in is downloaded.

Switching between aerial photos and topographic maps


After you know where you are in a photo, look at the commands that you can use to move around. As I mention earlier, TerraServer-USA provides both aerial photos and USGS topographic maps,and USAPhotoMaps lets you switch between the two types of images. (Figure above shows a topographic map.) This is useful because you can look at a topographic map and then immediately see what the same location looks like as an aerial photo. This is a big advantage because aerial photos often show more feature detail than topographic maps.
Here are the two ways (in USAPhotoMaps) to display a topographic map version of an aerial photo you’re viewing:
  • From the View menu, choose Map Type➪Topo.
  • Press the T key.
  • If gray squares appear onscreen, you haven’t downloaded map data for that area yet. To download the map, press the F key. To switch back to an aerial photo view of the location
  • From the View menu, choose Map Type➪Photo.
  • Press the P key.

Thursday, September 30, 2010

Getting the Most from Aerial Photos

After you have an aerial photo displayed, navigate inside the image. USAPhotoMaps has a number of different commands to view and manipulate the photo.
The datum used for all TerraServer-USA maps is NAD 83. This is nearly identical to the WGS 84 datum used as a default by GPS receivers. If you plan on using your GPS receiver with USAPhotoMaps, be sure that the datum settings match.
The first thing you’ll notice is that when you move the mouse cursor around the screen, map coordinates appear in the window title bar. This feature allows you to move the cursor over a feature that’s shown on the aerial photo and get its precise coordinates.
You can change how you want the coordinates displayed from the View menu. Choose the Lat/Lon item and then specify whether you want the coordinates shown in decimal degrees, degrees and decimal minutes, degrees/minutes/ seconds, or UTM formats.
Press the X key to display a dialog box with the coordinates that the cursor is currently over. You can copy the coordinates from this dialog box and paste them into another program.

Downloading Aerial Photographs

The first time you run USAPhotoMaps, a dialog box appears that prompts you to create a new map. You need to enter the following:
  • What you want to name the map.
  • The coordinates of the area you’re interested in viewing. The coordinates can be in either
• Latitude and longitude
• Universal Transverse Mercator (UTM)

If you don’t know the latitude and longitude coordinates of the location you’re interested in seeing, quickly skip over to Chapter 11 to read how to find coordinates of place names.
As an example, create an aerial photomap of Seattle, Washington.

1. Enter the name, latitude, and longitude in the New Map dialog box.
• Name: Seattle
• Latitude: 47.61431
• Longitude: 122.32898

2. Click OK.
A series of gray squares appear onscreen.

3. Download aerial photos from TerraServer-USA for the area that you specified (with the latitude and longitude coordinates). Make sure that you’re connected to the Internet and then press the F key.

A mosaic of aerial photograph images replaces the gray squares as the screen is filled with data from TerraServer-USA. The final result is shown in Figure below.


If you’re using a firewall, your computer might complain when USAPhotoMaps tries to connect to TerraServer-USA. Because the program is just downloading map data, you can give permission for USAPhotoMaps to access the Internet. If you plan to use USAPhotoMaps to build an extensive aerial photo collection, a high-speed Internet connection will make your life much easier. Each individual aerial photo or topographic map image in the displayed mosaic is roughly 50–200K in size. (The actual size depends on how much unique terrain is shown in the image.) At 2 meters-per-pixel resolution, it takes 70 images to fill the screen of a 1024 x 768 monitor; that’s anywhere from 7–17MB of data to download.